Troubleshooting
The following page provides suggestions for common errors that may occur during firmware compilation or other issues with keyboard usage. If the information provided is insufficient to resolve the issue, feel free to seek out help from the ZMK Discord.
File Transfer Error#
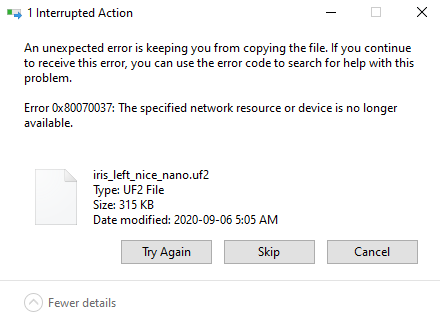
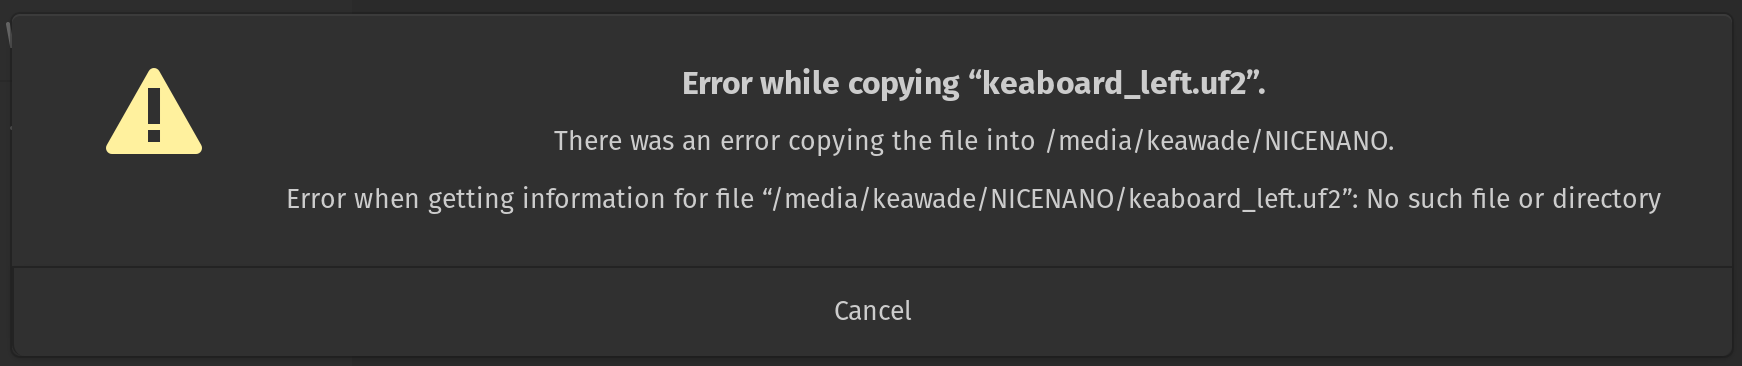
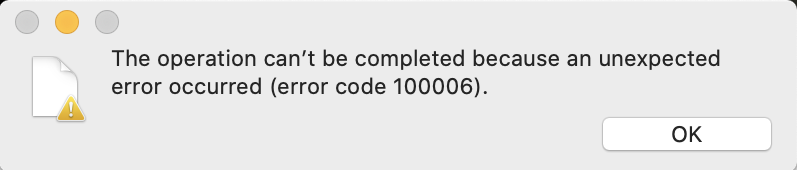
Variations of the warnings shown below occur when flashing the <firmware>.uf2 onto the microcontroller. This is because the microcontroller resets itself before the OS receives confirmation that the file transfer is complete. Errors like this are normal and can generally be ignored. Verification of a functional board can be done by attempting to pair your newly flashed keyboard to your computer via Bluetooth or plugging in a USB cable if ZMK_USB is enabled in your Kconfig.defconfig.
 |
|---|
| An example of the file transfer error on Windows 10 |
 |
|---|
| An example of the file transfer error on Linux |
 |
|---|
| An example of the file transfer error on MacOS |
CMake Error#
An error along the lines of CMake Error at (zmk directory)/zephyr/cmake/generic_toolchain.cmake:64 (include): include could not find load file: during firmware compilation indicates that the Zephyr Environment Variables are not properly defined.
For more information, click here.
dtlib.DTError#
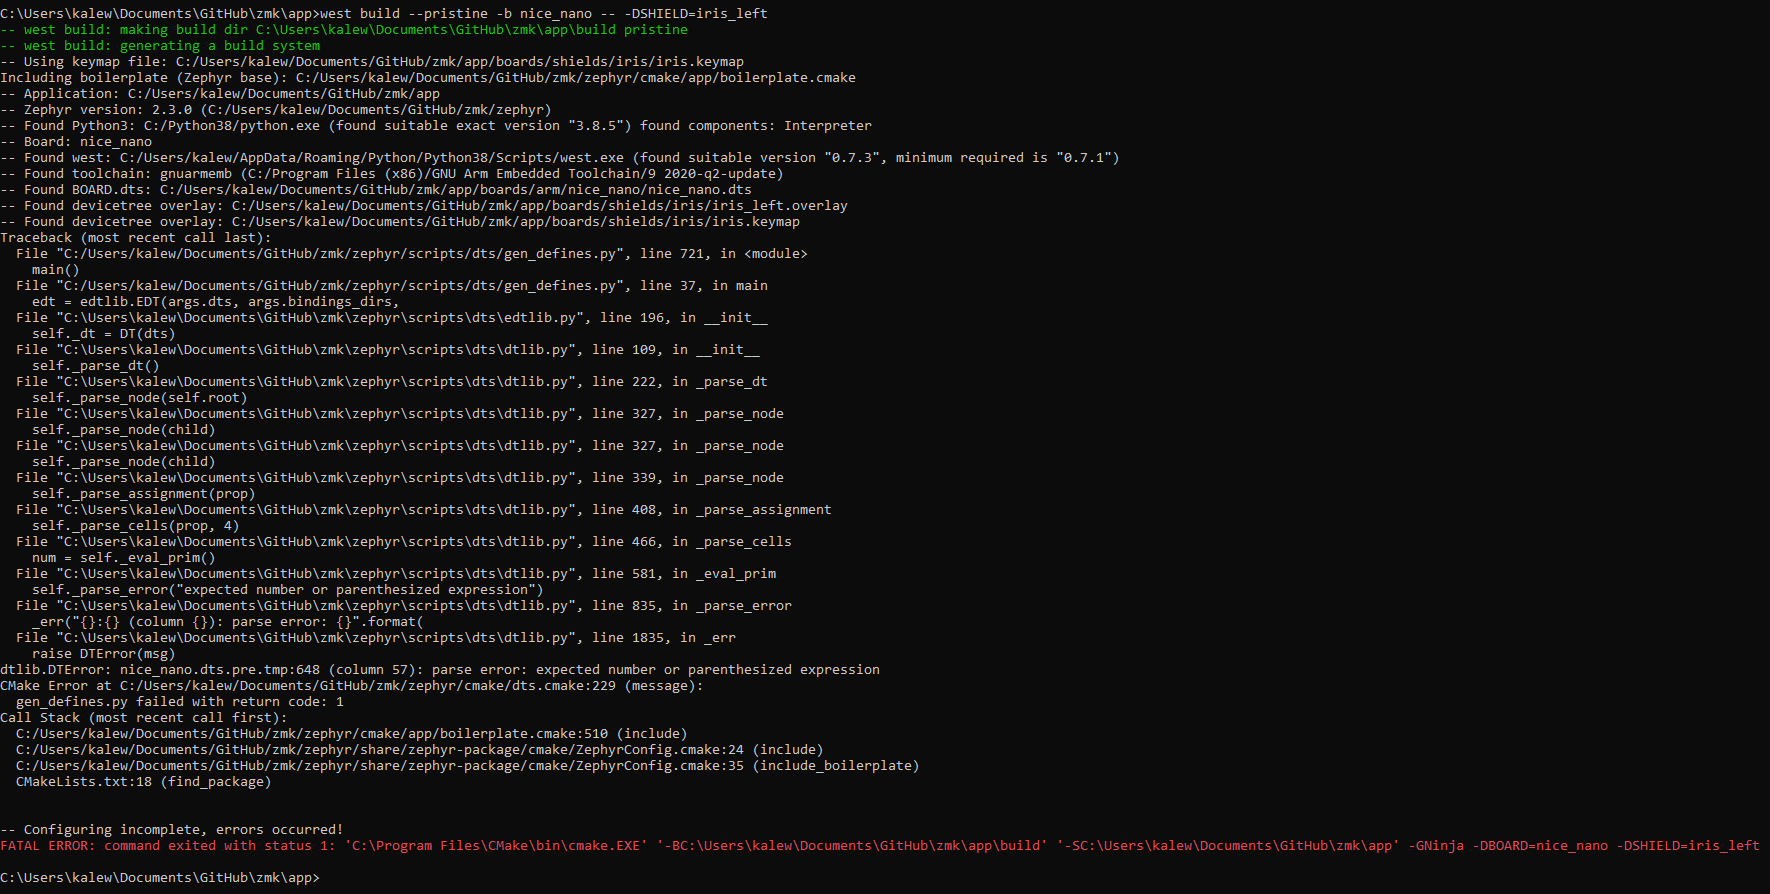
An error along the lines of dtlib.DTError: <board>.dts.pre.tmp:<line number> during firmware compilation indicates an issue within the <shield>.keymap file.
This can be verified by checking the file in question, found in mkdir/app/build.
 |
|---|
| An example of the dtlib.DTError when compiling an iris with the nice!nano while the keymap is not properly defined |
After opening the <board>.dts.pre.tmp:<line number> and scrolling down to the referenced line, one can locate errors within their shield's keymap by checking if the referenced keycodes were properly converted into the correct USB HID Usage ID.
note
If you are reviewing these errors in the GitHub Actions tab, the contents of <board>.dts.pre.tmp is output (with line numbers) in the next step of the build process.
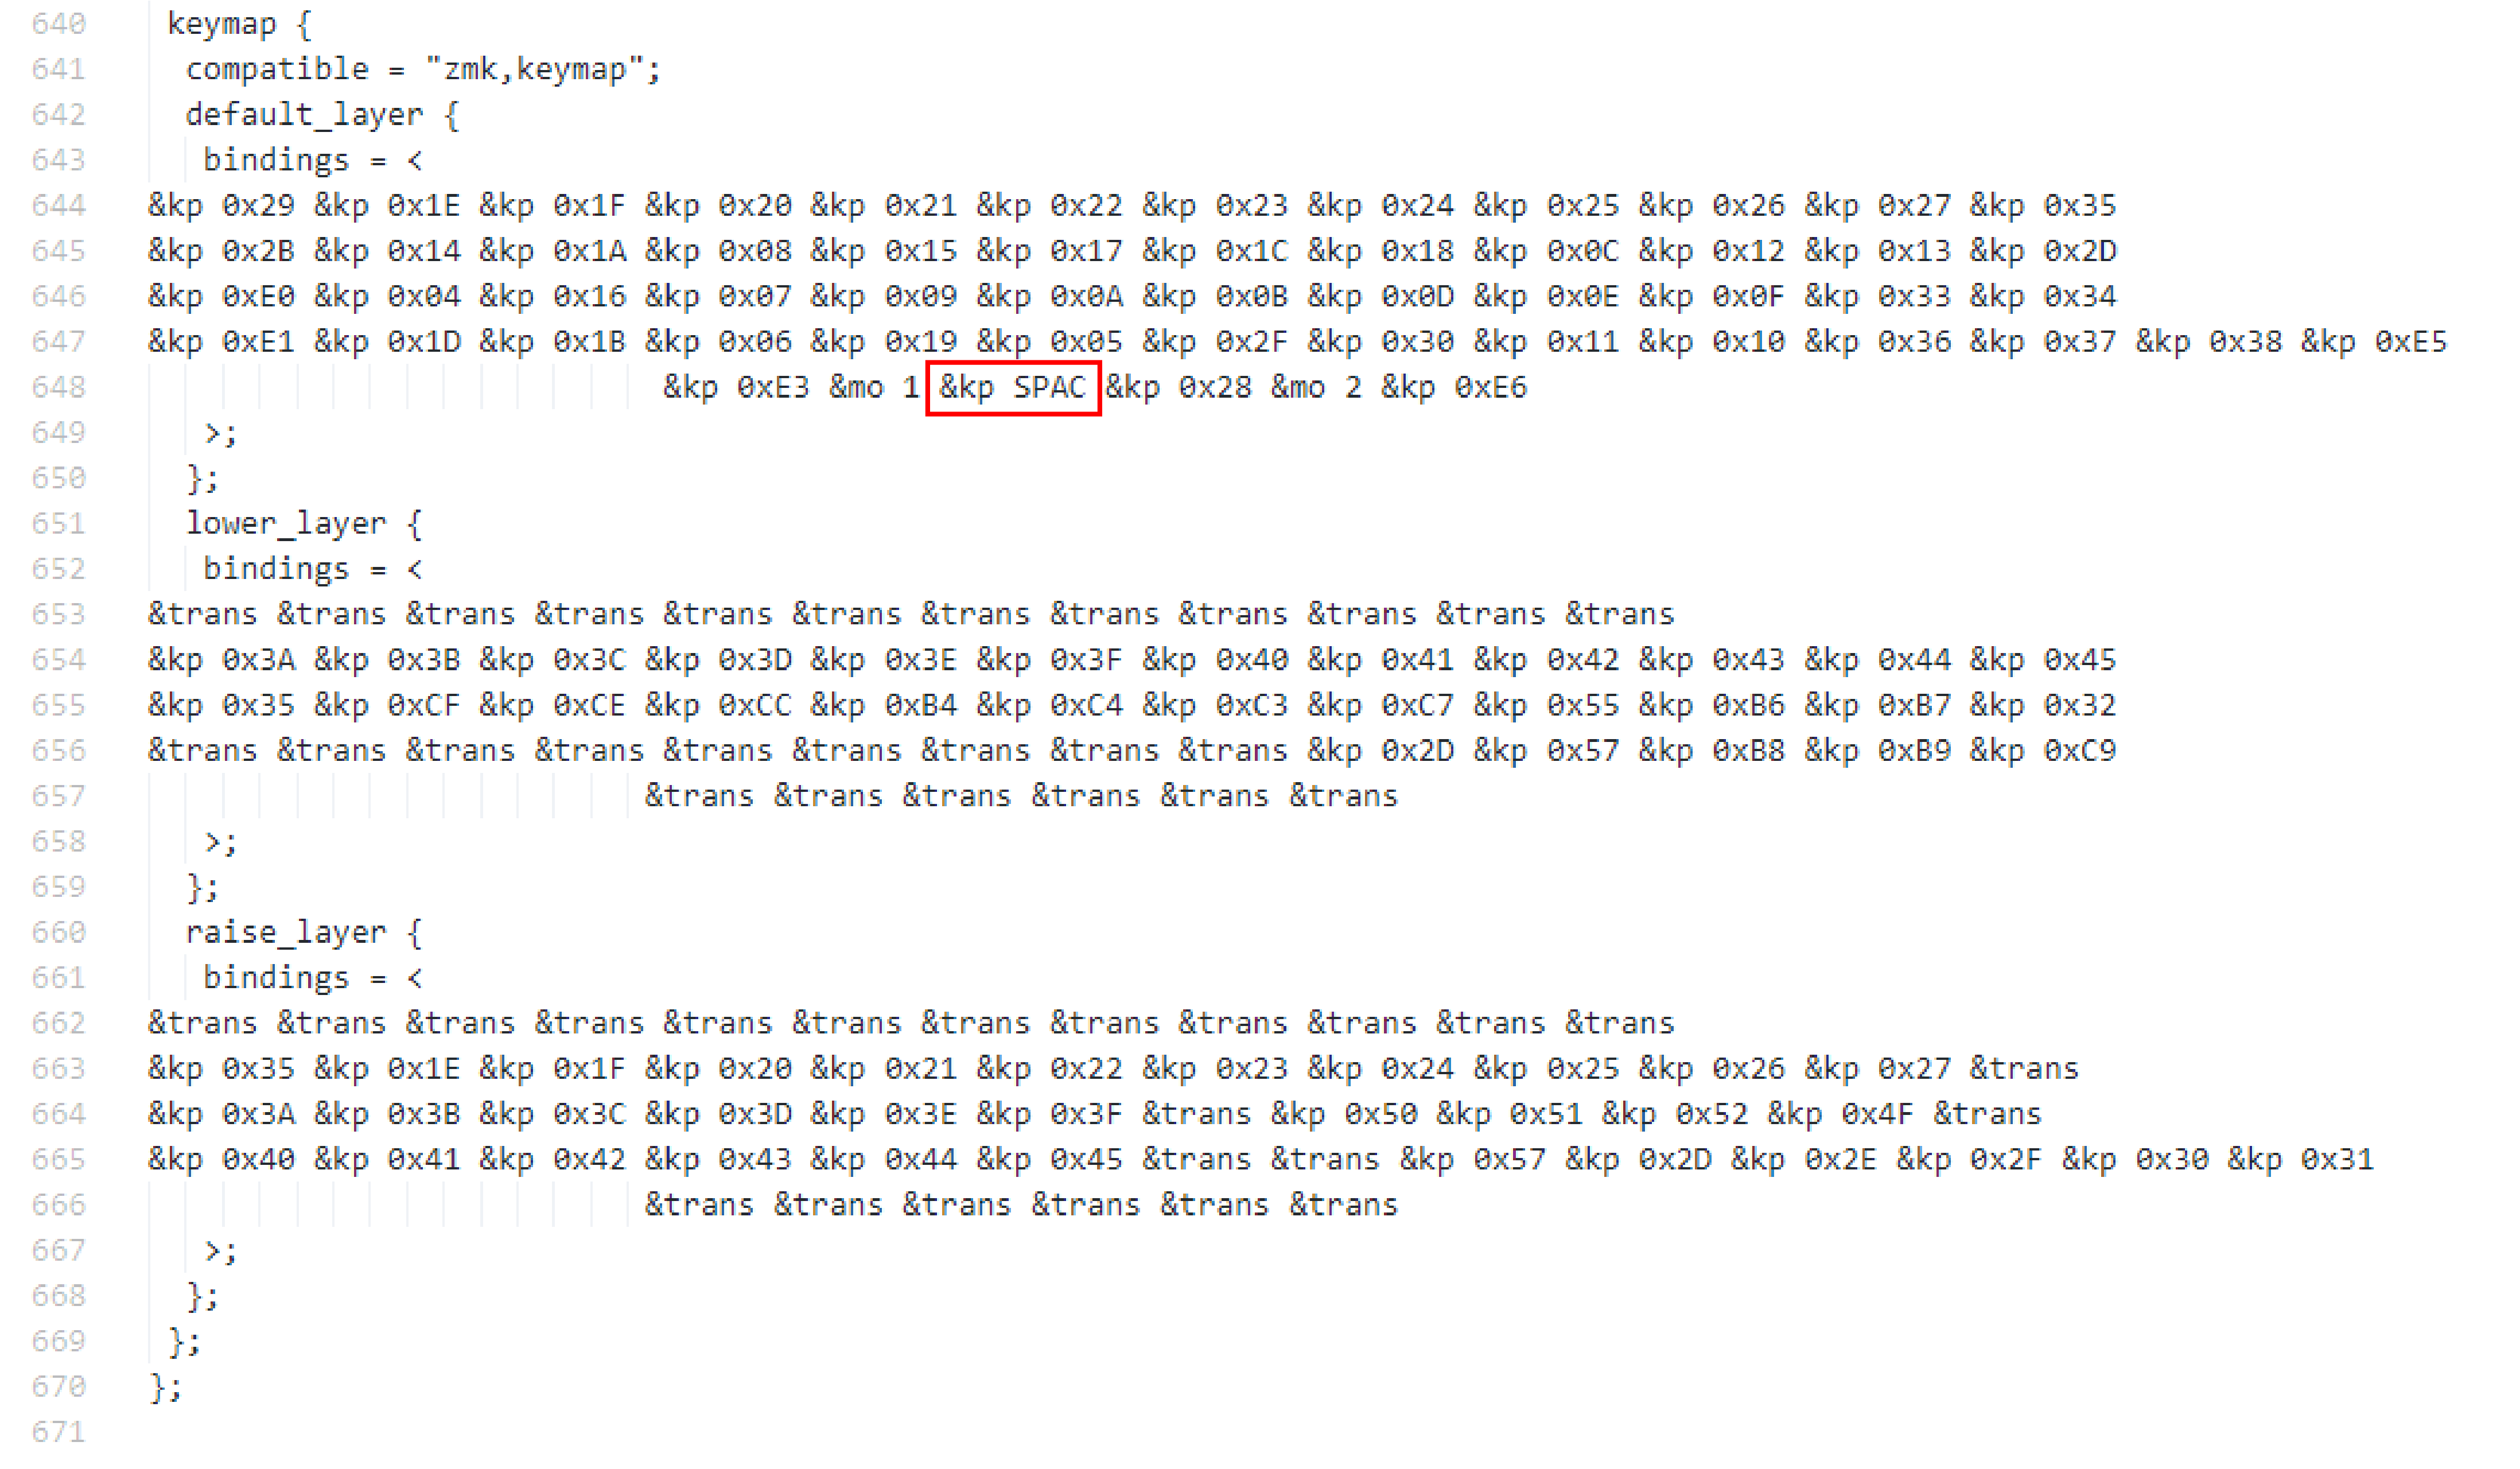 |
|---|
An incorrectly defined keymap unable to compile. As shown in red, &kp SPAC is not a valid reference to the USB HID Usage ID used for "Keyboard Spacebar" |
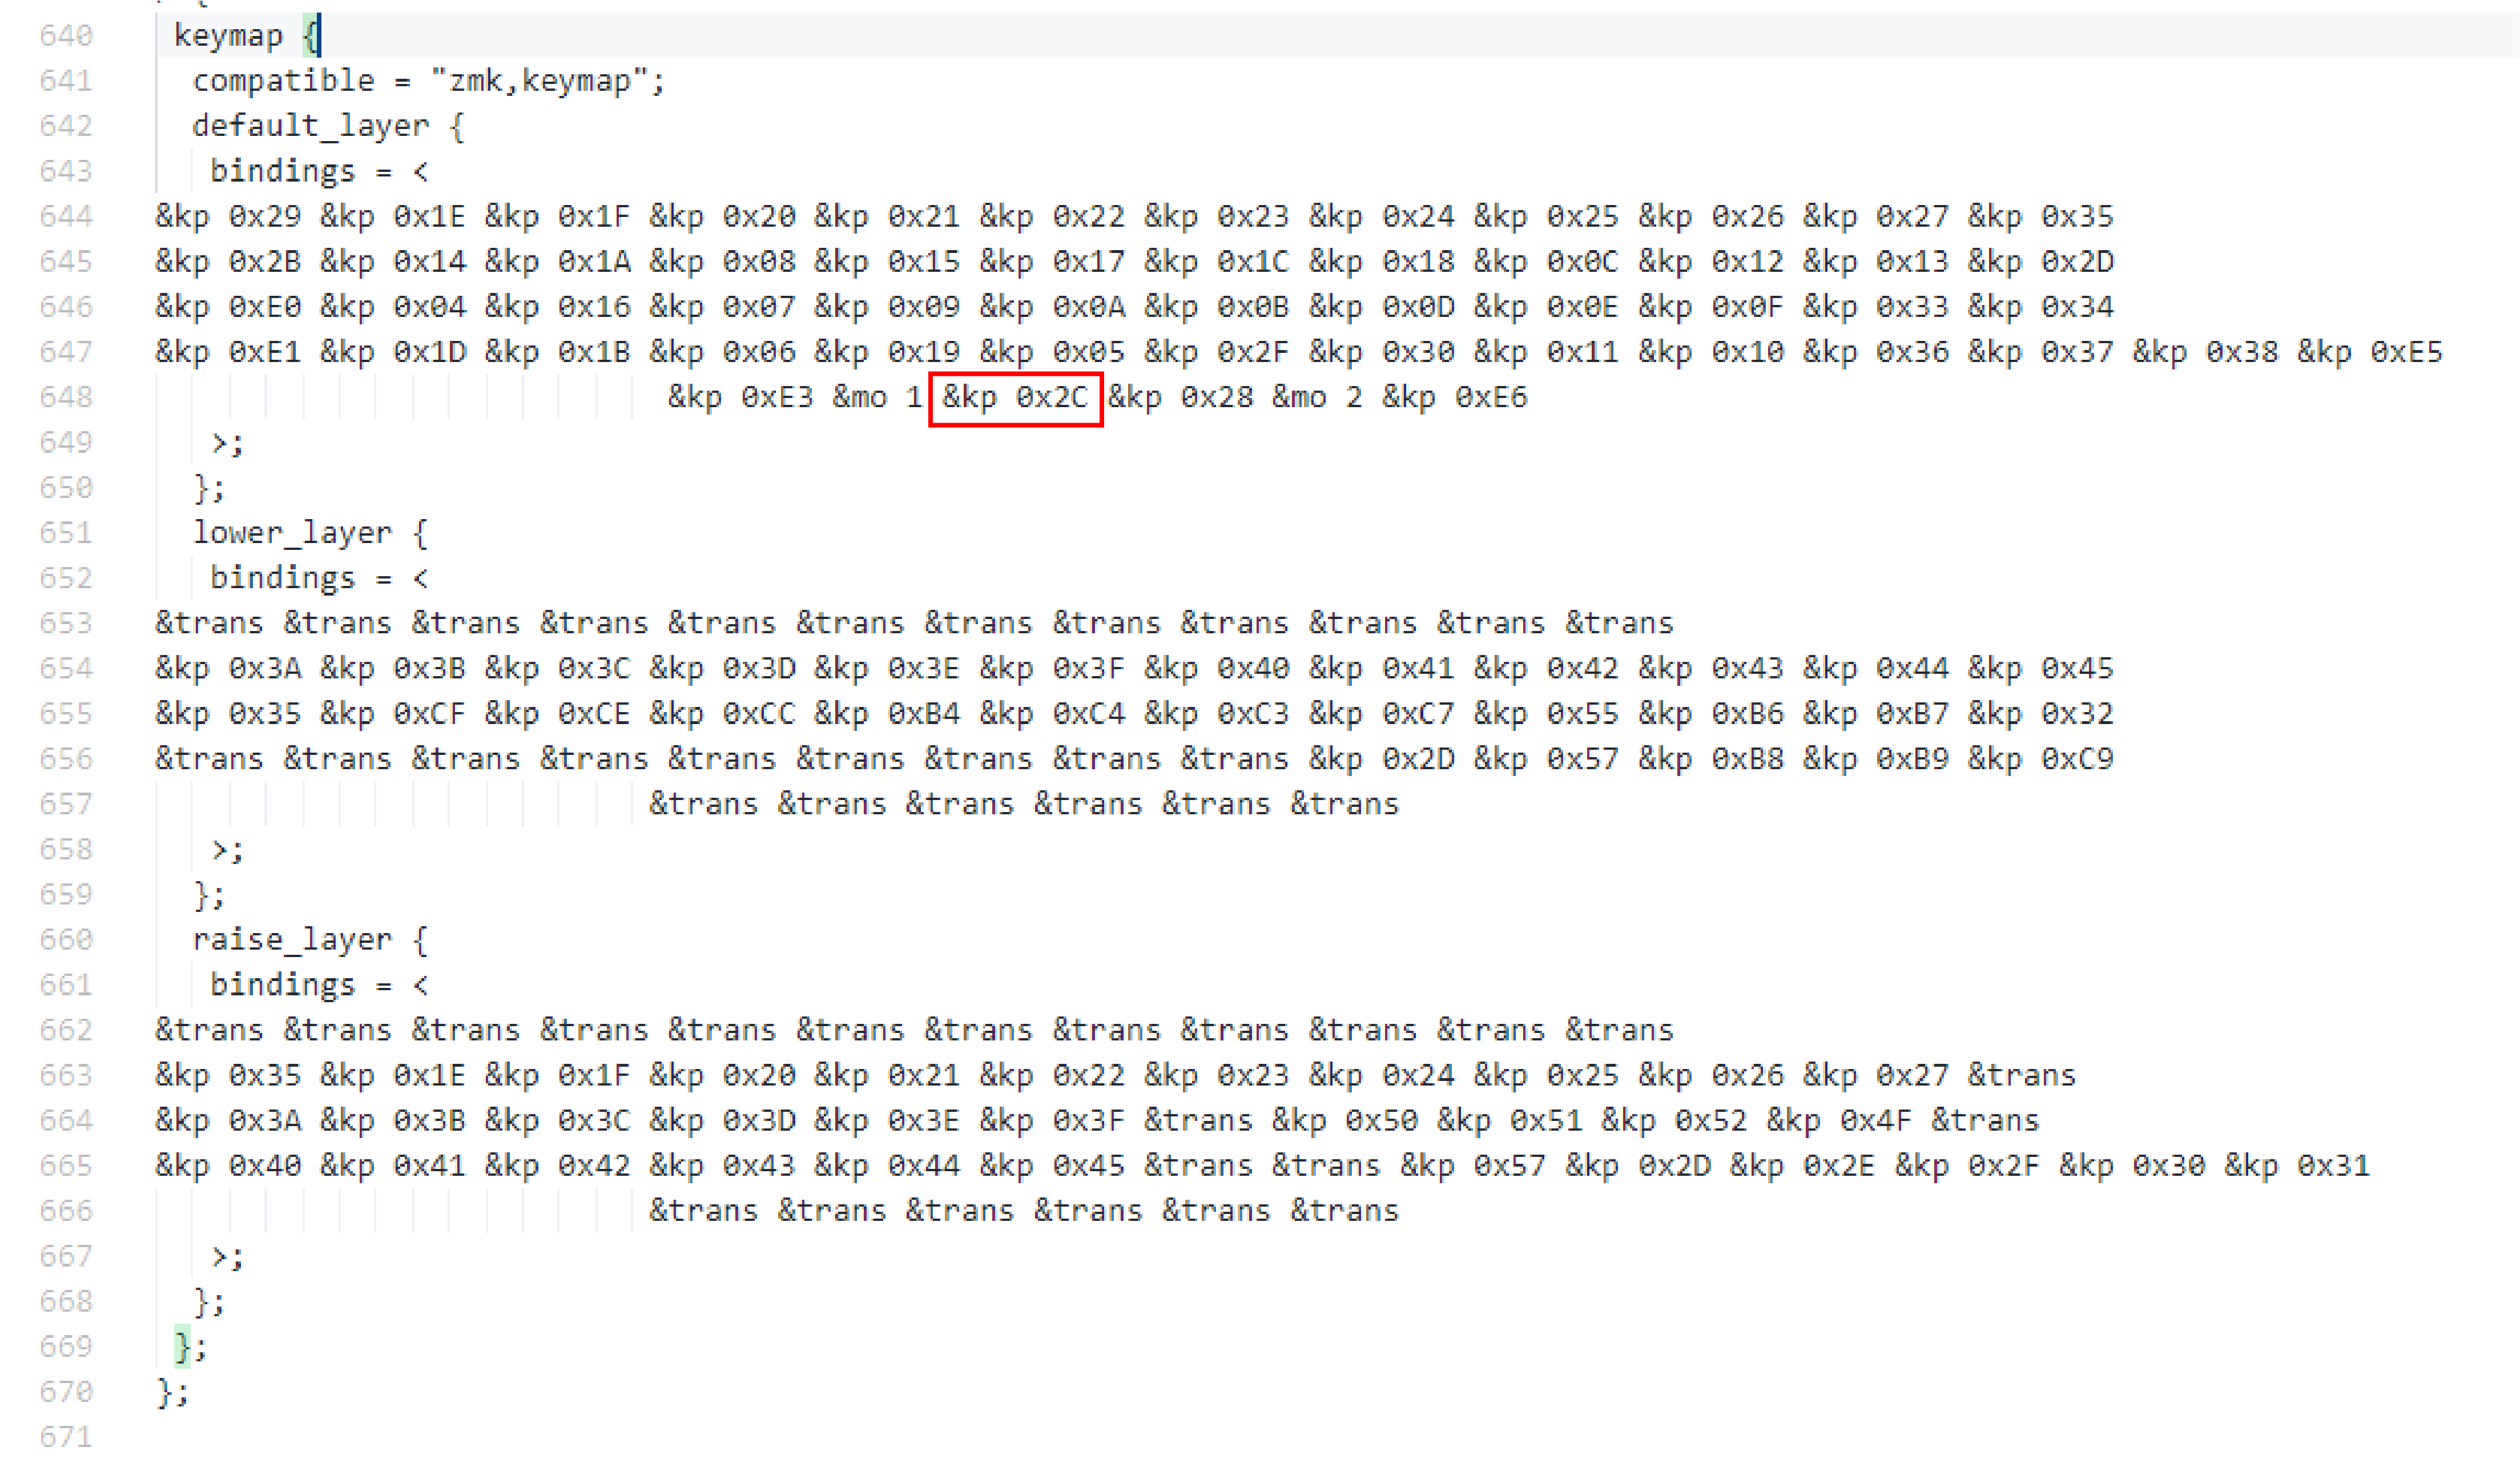 |
|---|
A properly defined keymap with successful compilation. As shown in red, the corrected keycode (&kp SPACE) references the proper Usage ID defined in the USB HID Usage Tables |
Split Keyboard Halves Unable to Pair#
Split keyboard halves pairing issue can be resolved by flashing a settings reset firmware to both controllers. You will first need to acquire the reset UF2 image file with one of the following options:
Option 1: Build Reset UF2 in 'zmk-config'#
Find the build.yaml file in your zmk-config folder and add an additional settings reset build for the board used by your split keyboard. For example assuming that the config repo is setup for nice!nano v2 with Corne, append the settings_reset shield to the build.yaml file as follows:
include: - board: nice_nano_v2 shield: corne_left - board: nice_nano_v2 shield: corne_right - board: nice_nano_v2 shield: settings_resetSave the file, commit the changes and push them to GitHub. Download the new firmware zip file build by the latest GitHub Actions job. In it you will find an additional settings_reset UF2 image file.
Option 2: Download Reset UF2 from ZMK's Workflow#
- Open the GitHub
Actionstab and select theBuildworkflow. - Find one of the 'results' for which the core-coverage job was successfully run, indicated by a green checkmark in the core-coverage bubble like the image example below.
- From the next page under "Artifacts", download and unzip the
<board_name>-settings_reset-zmkzip file for the UF2 image.
 |
|---|
| An example of a successful core-coverage job which will produce a settings_reset firmware. |
Reset Split Keyboard Procedure#
Perform the following steps to reset both halves of your split keyboard:
- Put each half of the split keyboard into bootloader mode.
- Flash one of the halves of the split with the downloaded settings reset UF2 image. Immediately after flashing the chosen half, put it into bootloader mode to avoid accidental bonding between the halves.
- Repeat step 2 with the other half of the split keyboard.
- Flash the actual image for each half of the split keyboard (e.g
my_board_left.uf2to the left half,my_board_right.uf2to the right half).
After completing these steps, pair the halves of the split keyboard together by resetting them at the same time. Most commonly, this is done by grounding the reset pins for each of your keyboard's microcontrollers or pressing the reset buttons at the same time.
Connectivity Issues#
Some users may experience a poor connection between the keyboard and the host. This might be due to poor quality BLE hardware, a metal enclosure on the keyboard or host, or the distance between them. Increasing the transmit power of the keyboard's BLE radio may reduce the severity of this problem. To do this, set the CONFIG_BT_CTLR_TX_PWR_PLUS_8 configuration value in the .conf file of your user config directory as such:
CONFIG_BT_CTLR_TX_PWR_PLUS_8=yFor the nRF52840, the value PLUS_8 can be set to any multiple of four between MINUS_20 and PLUS_8. The default value for this config is 0, but if you are having connection issues it is recommended to set it to PLUS_8 because the power consumption difference is negligible. For more information on changing the transmit power of your BLE device, please refer to the Zephyr docs.
Other notes and warnings#
- If you want to test bluetooth output on your keyboard and are powering it through the USB connection rather than a battery, you will be able to pair with a host device but may not see keystrokes sent. In this case you need to use the output selection behavior to prefer sending keystrokes over bluetooth rather than USB. This might be necessary even if you are not powering from a device capable of receiving USB inputs, such as a USB charger.